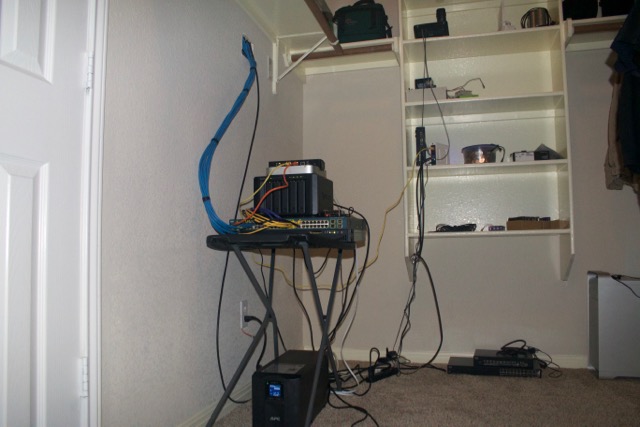
I wasn’t sure what I was going to do with my small collection of servers when I moved into the house, so they ended up stacked on a folding table. While it was functional, it certainly wasn’t the prettiest thing in the world. Plus there was the mess of power strips and cables…
After procrastinating for months, I finally got around to doing something about that this weekend.
The Cabinet
 I cannot afford a NetShelter CX – no matter how
badly I want one – so I settled on a StarTech 25U cabinet. It’s
pricier than an open rack, but will (in my opinion) look a lot
nicer. It’s going to last a decade or more, so the extra cost is worth
it.
I cannot afford a NetShelter CX – no matter how
badly I want one – so I settled on a StarTech 25U cabinet. It’s
pricier than an open rack, but will (in my opinion) look a lot
nicer. It’s going to last a decade or more, so the extra cost is worth
it.
Unfortunately, my little stack of servers lives in a walk-in closet, and it’s got one of those annoying skinny doors. Nothing wider than 23 inches is going through that door, and that includes almost any server cabinet I’ve ever seen.
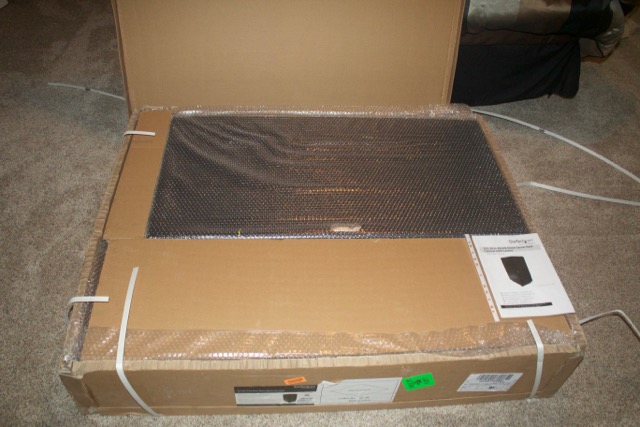
Luckily for me, Amazon will ship you a StarTech cabinet in what they call “Knock-Down” form, which is a partially assembled unit in a flat box. This means you can take the pieces through your annoying skinny door one by one and reassemble them inside. This also means that I hope not to move ever again: I’d have to de-rack everything and disassemble the cabinet to get it back out!
Some Assembly Required
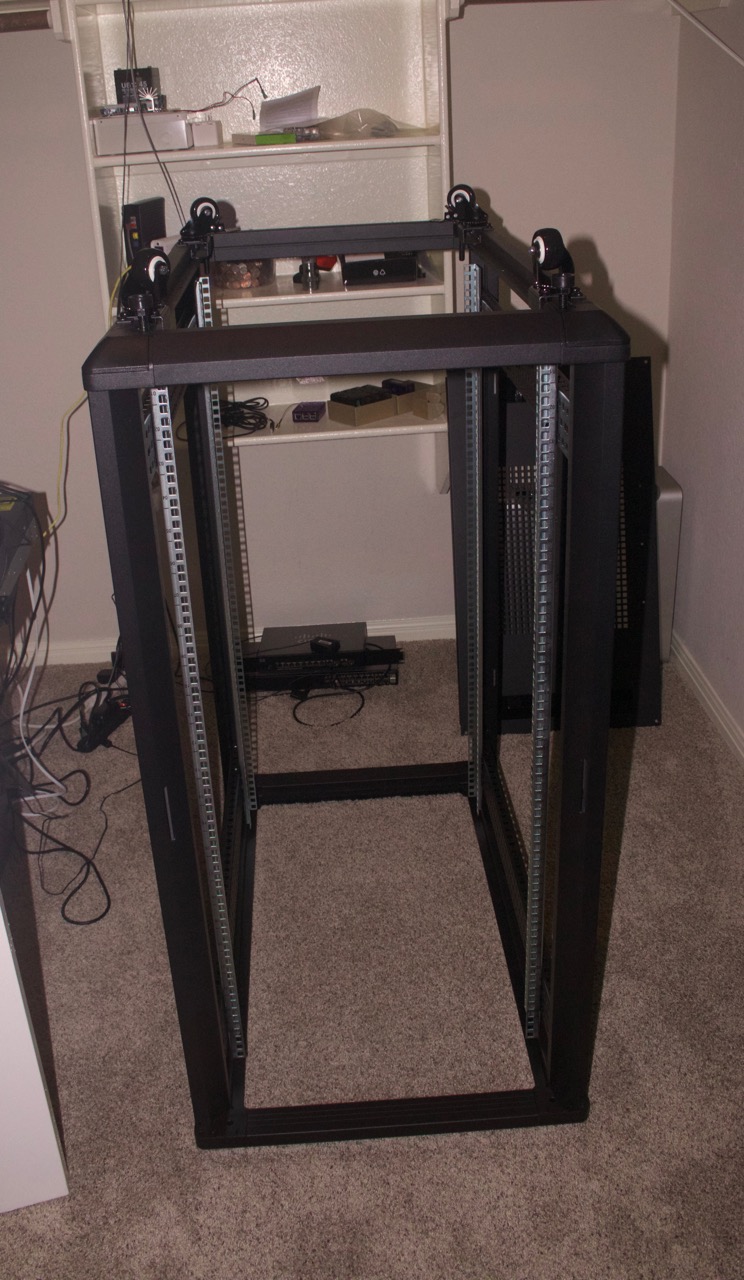 I was pleasantly surprised by the ease of
assembly. They ship the sides of the cabinet already assembled; all
you have to do is add four cross pieces between the two sides to hold
it together, screw on the floor and ceiling panels, and add some nice
plastic covers to the corners to make it look nice. Oh, and you can
optionally install the included casters, which I did.
I was pleasantly surprised by the ease of
assembly. They ship the sides of the cabinet already assembled; all
you have to do is add four cross pieces between the two sides to hold
it together, screw on the floor and ceiling panels, and add some nice
plastic covers to the corners to make it look nice. Oh, and you can
optionally install the included casters, which I did.
Then you rack your servers, pop the doors on, and you’re done.
Everything you need to build the thing is included, even the tools. Some of the bolts are hex, with the typical cheap hex wrench. There are also a bunch of philips-type screws, and a fairly nice screwdriver for them. They even include a small selection of cage nuts and screws for racking your equipment.
For me, working slowly, it took about an hour to assemble; I expect someone less distracted could get it done in thirty minutes at most. Someone who puts them together all the time could manage in ten or fifteen, maybe less.
When assembled, it’s a very solid unit. It’s not the slightest bit rickety. Even the casters seem to be of very high quality. My only complaint is that the side panels rattle a bit when bumped, but that would probably be an easy fix with a couple of thin adhesive-backed felt dots or something.
I was surprised by just how nice the thing is, even given the price.
It Will Teach You To Juggle
 Once the cabinet was built, it was time to rack my
equipment. I’ve known for a while I would eventually buy something
like this, so I’ve been leaning toward rackmount equipment recently –
but I also have some older stuff that isn’t rackmount
capable. Fortunately, I ordered a shelf along with the rack.
Once the cabinet was built, it was time to rack my
equipment. I’ve known for a while I would eventually buy something
like this, so I’ve been leaning toward rackmount equipment recently –
but I also have some older stuff that isn’t rackmount
capable. Fortunately, I ordered a shelf along with the rack.
Word of warning: mounting ear-mounted equipment without help kinda sucks.
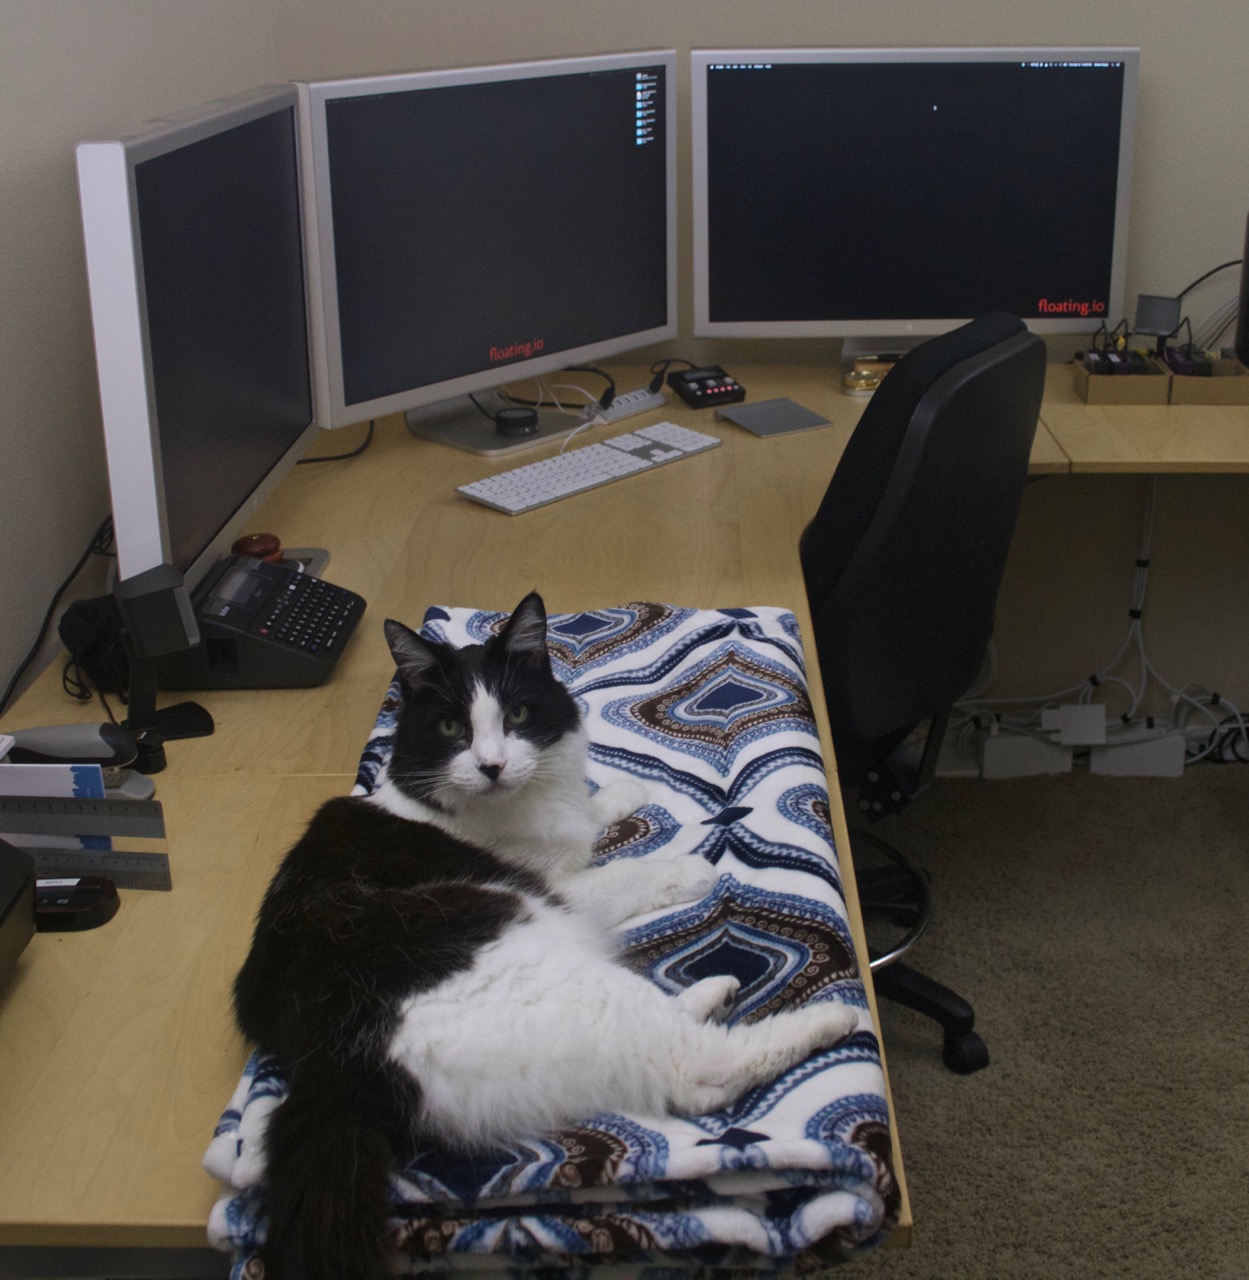
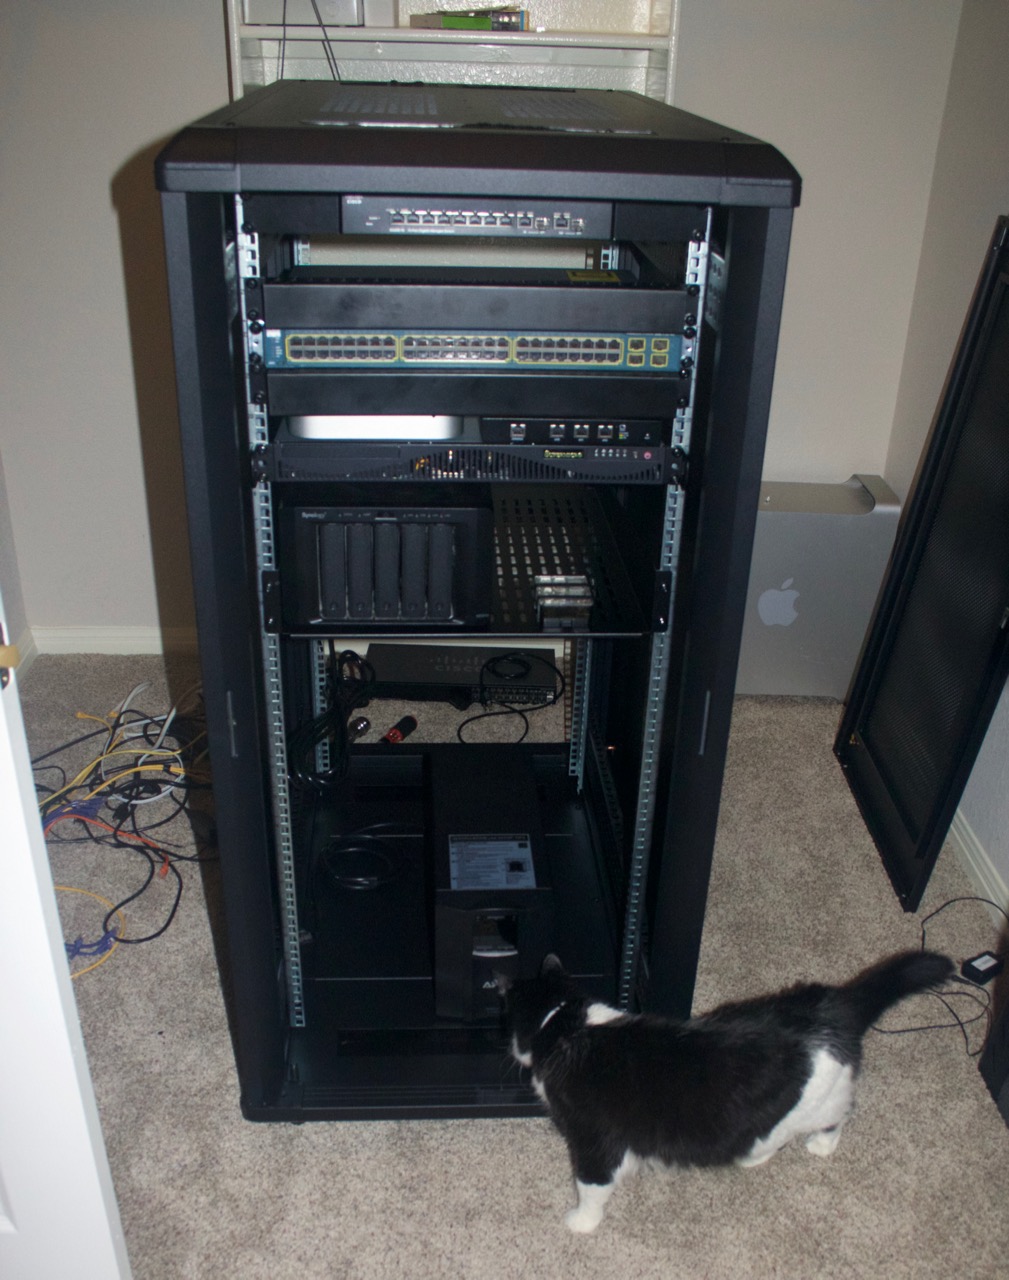
The image to the right shows how I first positioned things (very curious cat does not approve!). The black panels above and below the 3560G are finger ducts for cable management (really nice metal ones, too), and they proved to be a problem. The fingers aren’t long enough to work right that close to the switch (which sticks out a bit), and it’s almost impossible to release an ethernet cable from one of the switch ports.
So I ended up sliding the top cable duct up a unit, and the bottom one down a unit (along with everything below it). Unfortunately, I didn’t order any blank 1U panels, so now there are holes. It’s on my list of things to get.
I’m picky like that.
And for those of you who like to complain about front-mounted switches: on the rare occasion that I do this professionally, I do back-mount my switches. In this case, however, I want my switch on the front for accessibility. At home, I’m more likely to be plugging a laptop in than adding or rearranging servers, so I only have to cable it once.
I have a lab switch for playing with things anyway. It’s in my office.
In other words: I like the way it looks, and if you’re going to pick on it, I’m going to make excuses to justify it. I do not feel the slightest bit guilty for this.
The Finished Product
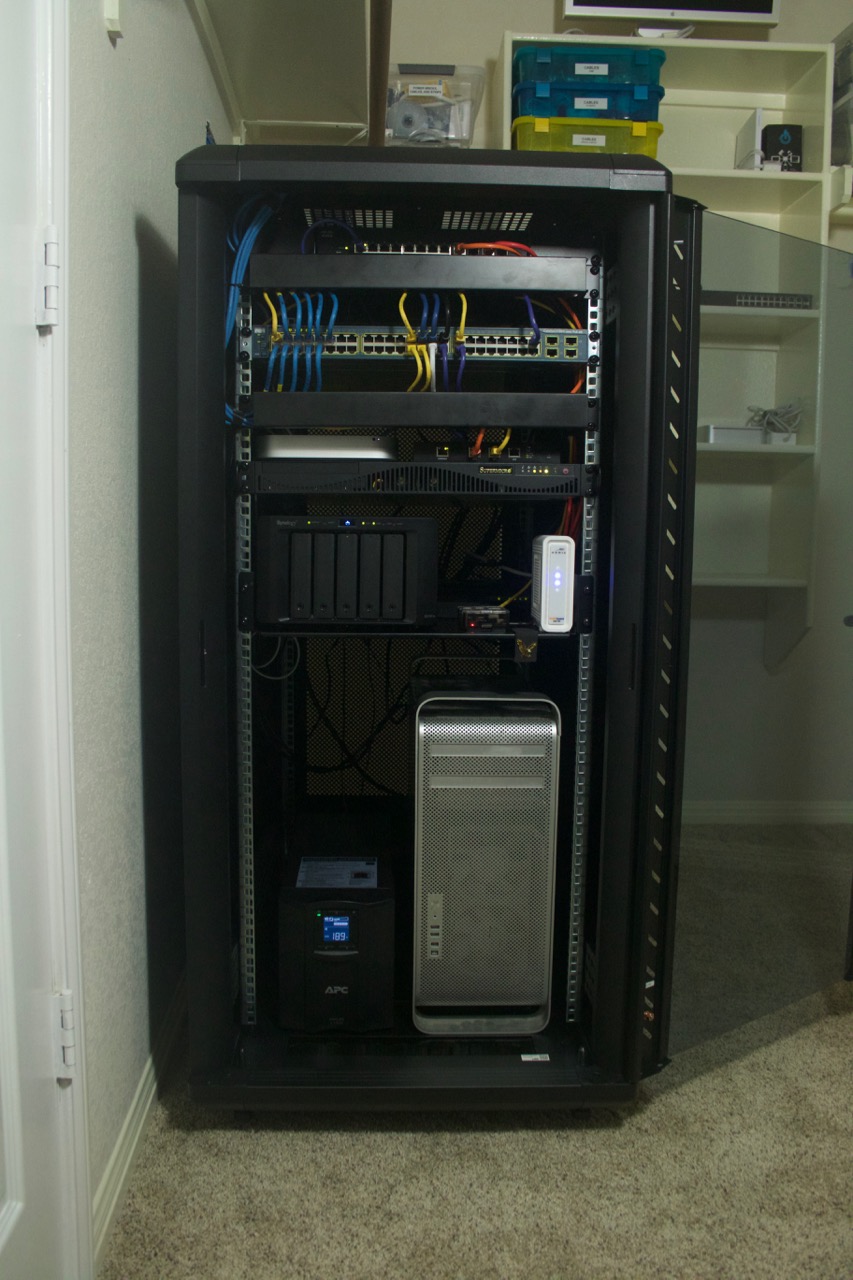 Once everything was racked, it was just
a matter of cabling it up. The servers themselves were boring enough
that I don’t even have pictures of the back. It’s not a perfect
cabling job, but it’s not a total disaster either. Extensive use of
velcro tape makes for much nicer cable runs.
Once everything was racked, it was just
a matter of cabling it up. The servers themselves were boring enough
that I don’t even have pictures of the back. It’s not a perfect
cabling job, but it’s not a total disaster either. Extensive use of
velcro tape makes for much nicer cable runs.
Mostly, I just need to buy new ethernet cables of more appropriate lengths. Maybe when I get bored again.
The bigger problem is the lack of a patch panel where my network cables head out to the rest of the house. I had a guy do a day’s worth of cabling back when I bought the place (and there were a couple of nasty runs), but I haven’t yet finished the job, and the cables just hang out of the wall on this end. There isn’t much slack there; the rack can only move about a foot in any direction without damaging the cables.
For contrast, I have about eighteen thousand feet of extra length in the cable internet feed. Go figure.
I also can’t push the rack as close to the wall as I’d like, which means I can’t squeeze it into the corner next to the shelf. The reason? There’s a power outlet in the way – the only outlet in the closet, and the one that powers the whole damn thing, so I can’t avoid it.
My only option there is to take the wall side of the cabinet off, but I’m just not willing to go there.
Yet.
What’s Next?
 The obvious next step is to install a recessed box in
the wall next to the rack. The network will be much easier to deal
with if I have a patch panel there instead of dangling cables. I only
wish there was something similar to RJ21 for Cat 6…
The obvious next step is to install a recessed box in
the wall next to the rack. The network will be much easier to deal
with if I have a patch panel there instead of dangling cables. I only
wish there was something similar to RJ21 for Cat 6…
The idea of running twenty or so ports through a couple of big cables – without putting a switch on the wall – is an awfully nifty one…
I also want a rackmount UPS; the one I’ve got in there is undersized anyway.
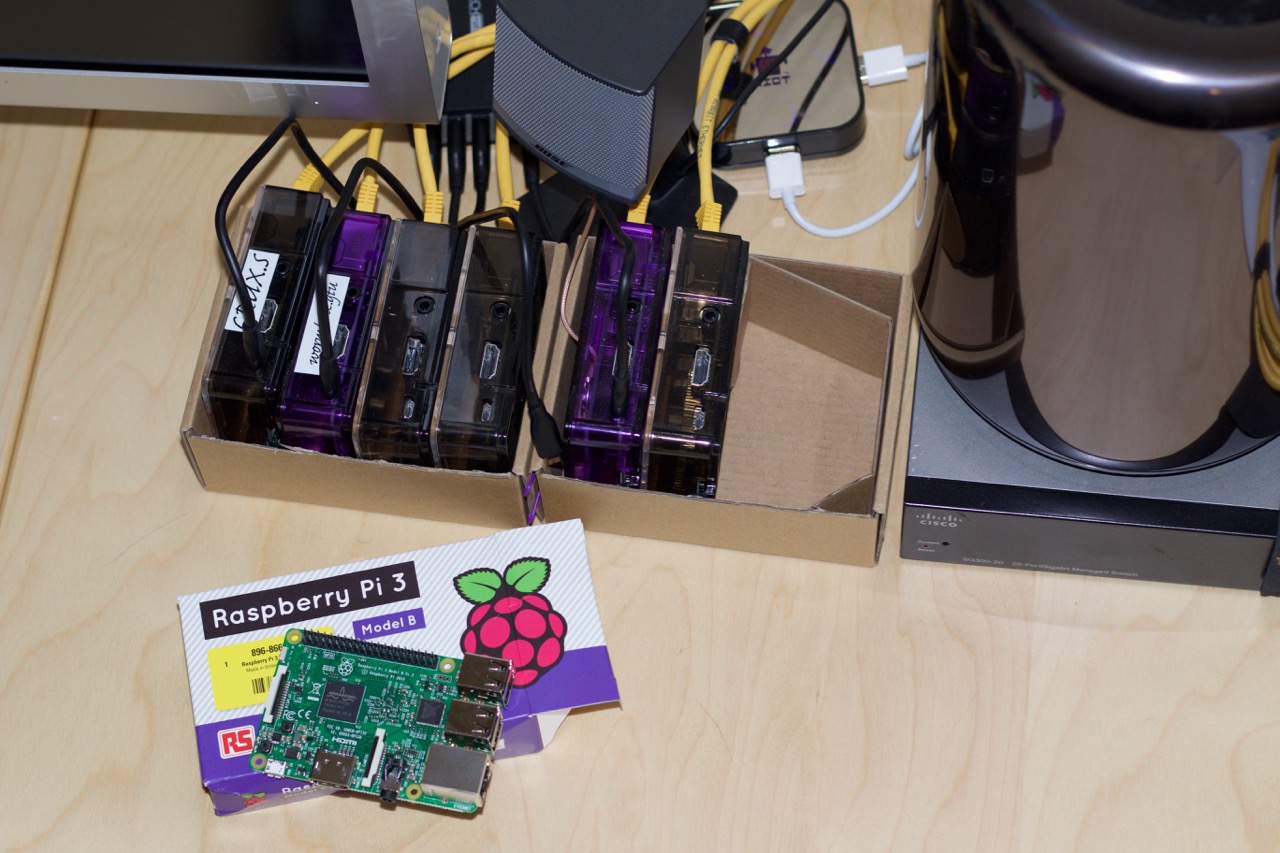
On the “really soon” list, is picking up a 1U shelf on which to reconstruct my Raspberry Pi farm (you can see my collection of Pi’s peeking out of their box if you look closely enough…). I’m still thinking on how to make that convenient (USB network PDU?), but it shouldn’t be too difficult. The idea of a dozen or so Pi’s packed into a 1U “case” is kinda intriguing though.
Or maybe a few dozen standing on their sides in a 2U or 3U case? Hmmm….
I wonder if openMOSIX will run on a Pi?